Karyotype Analysis Protocol
GUIDELINE
Karyotype analysis is the study of mid-chromosome divisions. With the help of banding techniques, chromosomes are analyzed, compared, classified, and numbered according to their length, the location of mitotic sites, the ratio of long and short arms, the presence or absence of follower and other characteristics, and diagnosed according to changes in chromosome structure and number. Karyotype analysis can provide an important basis for cytogenetic classification, species relatedness, and chromosome number and structural variation study.
METHODS
Colchicine treatment
- Observe the cell status under an inverted microscope and culture until the cells are growing vigorously and the confluence is about 70-80% when harvested.
- 2.5 hours before harvesting, add colchicine to the medium so that the final concentration is 0.2 μg/mL.
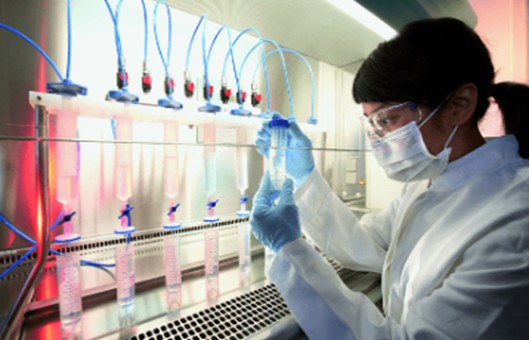
- Digest and collect the cells by routine operation into 15 mL centrifuge tubes with tips and set aside.
Hypotonicity
- Fully preheat 0.075 mol/L KCL hypotonic solution in a 37°C water bath.
- Centrifuge the cells by routine operation, remove the supernatant, and leave the cell precipitate.
- Add 8 mL of pre-warmed hypotonic solution and mix thoroughly by blowing using a glass pipette.
- Cover and place in a 37°C water bath for 15 minutes.
- After routine centrifugation, remove the supernatant by using a glass pipette, and leave about 0.5 mL volume of residual fluid to avoid loss of cells.
Fixation
- Gently scrape the bottom of the centrifuge tube and use light shaking to allow the swollen cell sediment to resuspend, with the suspension visible as a more uniform pale white.
- Pre-fixation. Add freshly prepared fixing solution dropwise along the tube wall, shake the tube gently, add about 1 mL of fixing solution, and fix for 5 minutes.
- Centrifuge at regular speed for 10 minutes, discard the supernatant using a glass pipette and leave about 0.5 mL of residual solution.
- The first fixation. Slightly shake to let the bottom cells resuspend, add 5 mL of fixative, and use a glass pipette to gently blow several times. Cover with a lid to protect from light and leave at room temperature for 30 minutes.
- Centrifuge at regular speed for 10 minutes, discard the supernatant using a glass pipette and leave about 0.5 mL of residual solution.
- Second fixation. Resuspend the bottom cells with a slight shaking, add 5 mL of fixative, and blow gently with a glass pipette several times. Cover with a lid to protect from light and leave at room temperature for 30 minutes.
- Centrifuge at regular speed for 10 minutes, discard the supernatant using a glass pipette and leave about 0.5 mL of residual solution.
- Gently shake to allow the bottom cells to resuspend and form a cell suspension.
Slice preparation
- Wipe the slides with alcohol and dry them for use. Use forceps to make sure the frosted side is the front side of the slide. During the whole process, avoid finger contact to prevent fingerprints on the non-frosted surface.
- Aspirate a small amount (usually 100 μL) of cell suspension and add the suspension to the slide in a gradual drip at a height of 30-40 cm, avoiding as much as possible the area that has already been dripped.
- Immediately after the drop is added, the suspension is quickly over-fixing several times under the flame of an alcohol lamp, and the fixative evaporates and visible cell pellets are seen on the slide. Mark the sample concerning the content and place it on a slide stand to dry.
- The cell density should be such that the cells do not overlap and 100-200 cells per field of view at low magnification after slide dropping. No staining is required after drip staining and can be placed under an inverted phase contrast microscope to observe the split phase.
Giemsa staining
- Take 5 mL of 2.5% trypsin solution, and add it to the staining jar.
- Add 45 mL of physiological saline, adjust the trypsin solution to purplish red (pH 6.8-7.2) with HCl or NaOH and phenol red, and set it at 37°C to pre-warm.
- Place the slide specimen into the trypsin solution for 20-25 s. Shake the slide gently and continuously to make the trypsin work evenly. Remove the chromosome slide specimens and place them in pre-warmed saline at 37°C for a few moments. Immediately put it into pre-warmed Giemsa staining solution at 37°C, stain it for 10 minutes, rinse it with a wash bottle (pure water), and dry it with a hair dryer on cold airflow.
Creative Bioarray Relevant Recommendations
- Visualization of cellular and tissue structure is critical to generate new knowledge for cell biology and defining disease mechanisms. We offer a variety of dyes to help you better understand molecular biology and drug development research. For more information, please see the table below.
| Product & Service Types | Description | Recommended Products |
| Histological Stains & Dyes | Histological staining is often used to provide visibility into specific biological tissues. This technique can help us to better conduct molecular biology research. | Eosin staining solution, Hematoxylin staining solution, Masson staining package, Wrights-Giemsa staining package… |
| Staining Services | Creative Bioarray offers a variety of comprehensive and reliable special staining for sectioned paraffin-embedded tissues or cells to fit all individual needs. | Special Staining Services |
Photo analysis of the split phase
- Find the split phase under low magnification. Select single cells with good dispersion and clear chromosome outline (split phase).
- Selection criteria. The split phase should be intact and independent, with chromosomes not too loose and no other split phases nearby around. The chromosome morphology is moderate, not excessively short or slender, and the chromosomes are not cross-linked and entangled with each other, or the cross-linked chromosomes can be distinguished. The chromosome G bands are generally clear, and the detectors can accurately determine the chromosome number.
- Move the object ready for observation to the center of the field of view, and switch to a high magnification and oil microscope to observe.
- Count the number of chromosomes and record the test results.
NOTES
High-resolution banding techniques such as chromosome G-banding can accurately identify chromosomes and determine whether the karyotype is normal.