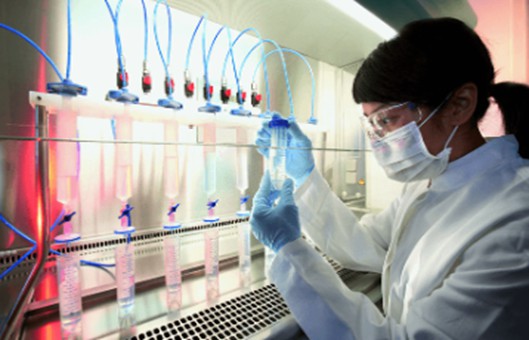
Flow Cytometric Analysis Protocol
GUIDELINE
Flow cytometric analysis is a technique for rapid quantitative analysis and sorting of cells or other biological particles (such as microspheres, bacteria, small model organisms, etc.) arranged in a single column in a liquid stream, one by one, and is widely used in all aspects from basic research to clinical practice, covering the fields of cell biology, immunology, hematology, oncology, pharmacology, genetics, and clinical testing, playing an important role in various disciplines.
METHODS
- Cells are cultured in 96-well plates and collected directly in 1.5 mL EP tubes, centrifuged at 350g, 4°C for 5 min, and the supernatant is discarded.
- Then resuspend the precipitate with 1mL FACS buffer, centrifuge at 350 g, 4°C for 5min, and discard the supernatant.
- Fluorescein-coupled antibodies for labeling sample cells are mostly monoclonal antibodies, and a few may be polyclonal antibodies, whose basic structure consists of two parts, namely, a Fab segment containing a specific binding antigen site and a relatively conserved Fc segment, the specificity of the antibody is expressed in the Fab segment, and the antigen binding site of the Fab segment is used to specifically bind to the antigen molecule on the cell when labeling, thus labeling and relatively quantifying The antigen binding site of the Fab segment is used to specifically bind to the antigen molecule on the cell, thus labeling and relatively quantifying the expression of the antigen molecule by the cell. However, some cells express FcR (Fc receptor), such as macrophages, DCs, and B lymphocytes, and FcR can bind non-specifically to the Fc segment of fluorescein-coupled antibodies, which may affect the results.
- For human cells, if the fluorescein-coupled antibody is mouse-derived, mouse serum whole IgG antibody is used. The principle is that if the flow-through antibody may bind non-specifically to the FcR of the sample cells, then the sample cells are saturated with FcR on the surface of the sample cells by blocking with a flow-through antibody homologous to the whole IgG antibody before labeling with the fluorescein-coupled antibody.
- Closure method 2. The appropriate amount of anti-CD16 and anti-CD32 monoclonal antibodies are mixed with the sample cells and left for 15 min at 4'C. CD16 is an FcR that binds to the Fc segment of IgG with high affinity, while CD32 is also an FcR that binds to the Fc segment of IgG with medium affinity. Fluorescein-coupled antibodies are IgG antibodies, so you can use anti-CD16 and anti-CD32 monoclonal antibodies to block the sample cells before labeling fluorescein-coupled antibodies, so that the FcR on the surface of the sample cells are bound by anti-CD16 or anti-CD32 monoclonal antibodies, thus preventing the non-specific binding of subsequent fluorescein-coupled antibodies to FcR.
- Label the corresponding fluorescein-coupled antibodies, here CD3-APC-Cy7, CD4-FITC for example, 100 μL is recommended for general chromosome lines, CD3, CD4 expression is relatively high, 1 μL is sufficient, if there are 9 samples, take 10 μL CD3-APC-cy7, CD4-FITC respectively and add to 1.5mL EP tube containing 990 μL After mixing, take 100 μL and add to 9 sample wells respectively, mix well, and stain at room temperature, protected from light for 20min.
- Add 1mL FACS buffer to ish away the unbound antibody, centrifuge at 350g, 4°C for 5min, discard the supernatant, resuspend the precipitate with 200 μL FACS buffer or 2% paraformaldehyde, and analyze on the machine as soon as possible.
- Check the power supply of the regulator, turn on the power, and stabilize it for 5 minutes.
- Open the reservoir, pour off the iste liquid, and add 400mL of bleach stock solution to the iste liquid bucket. Open the pressure valve, remove the sheath liquid bucket, add the sheath liquid bucket to 4/5 full (generally available in triple distilled water, to do sorting must use PBS or FACSFlow), and close the pressure valve. Make sure the bucket is tightly covered and check that all lines are properly placed.
- Turn the FACSCalibur switch on, the display of the instrument function control knob should be STANDBY, and warm up for 5-10 minutes. Drain the air bubbles in the filter.
- Perform the PRIME function once to remove the air bubbles from the flow cells.
- When analyzing the sample, perform HIGH RUN with FACAFlow or PBS for about 2 minutes first.
- From the Cytometer command bar, open the four dialog boxes Detectors/Amps, Threshold, Compensation, and Status, and move them to the right side of the screen to adjust the acquisition conditions at any time when acquiring data.
- In the Detectors/Amps dialog box, first, select the appropriate multiplication mode for each parameter: Lin in linear mode or Log in logarithmic mode; for general cell surfaces antigen analysis such as analysis of lymphocyte subpopulations in peripheral blood, FSC, and SSC are mostly measured in Lin in linear mode and FL2 in DDM Param, while FL1, FL2, and FL3 are measured in logarithmic mode; for analysis of cellular DNA content, FL2 and FL3 are measured in logarithmic mode. When analyzing cellular DNA content, FSC, SSC, FL1, FL2, and FL3 are measured in Lin mode and FL2 is selected by DDM Param; when analyzing platelet phenotype, FSC, SSC, FL1, FL2, and FL3 are measured in Log mode.
- Put on the sample to be tested, set the flow cytometer to RUN, and the flow rate can be on HIGH, MED, or LOW.
- Start acquiring cells.
- Set the Threshold by selecting the appropriate parameter in the Threshold dialog and adjust the Threshold too high or low to reduce the noise signal (cell debris). The Threshold does not affect the signal acquisition by the detector but improves the picture quality.
- Select Region from the drawing tool in the left column of the screen and set the region line around the target cells, commonly referred to as gating. Circling the right group of cells makes the instrument easier to adjust.
- In the Detectors/Amps dialog box, adjust the multiplication level of the fluorescent detectors (FL1, FL2, FL3, FL4, etc.). Adjust the cell population to be distributed in the correct area according to the fluorescent negative control sample used.
- Place the sample tube in the detection area and select Acquire in the Acquire Control dialog box to start the sample analysis assay.
- After fine-tuning the instrument settings, select Pause, Abort, and remove the "√" before Setup in the Acquire Control dialog box to start formal signal acquisition and data storage.
- After a certain number of cells have been measured, the acquisition will stop automatically and the data will be stored automatically. When all samples have been analyzed, replace them with triple distilled water and put the flow cytometer in a "STANDBY" state to protect the laser tube.
Creative Bioarray Relevant Recommendations
- To accelerate our customers' research, we offer staining kits for flow cytometry, such as BrdU Staining Kit for Flow Cytometry FITC, BrdU Staining Kit for Flow Cytometry PE, BrdU Staining Kit for Flow Cytometry APC, and others. These kits are optimized for brighter staining compared to conventional protocols.
NOTES
- At the cell preparation and culture stage, if the cultured cells are adnexal, it is necessary to digest the cells with trypsin first, then collect the sample cells to be tested, centrifuge, wash, and close them, and then label them with fluorescein-coupled antibody.
- If it is a peripheral immune organ such as the thymus, spleen, and lymph nodes, which mainly consist of immune cells made into single-cell suspension, it is only necessary to grind the organ directly through the stencil.
- In the case of solid organs lungs, liver, and tumor tissues contain more connective tissues, and the cells of solid organs are generally tightly bound to each other, so the direct grinding of organs method cannot obtain the ideal single-cell suspension. Therefore, the organelles need to be cut up and digested with type IV collagenase and DNA endonuclease before grinding, and the digested tissue is then ground directly with a grinding rod. The single-cell suspension after solid organ grinding is mainly solid cells. If the target of the study is not solid cells but immune cells infiltrated in the organ, immune cells can be enriched by Percoll density gradient centrifugation and then flow analysis.
- When adjusting the voltage, if the detected target cells are small in size, the voltage value can be appropriately increased so that the target cells and cell debris can be completely separated in the flow pattern; if the detected target cells are large in size, the voltage value can be appropriately decreased so that all the target cell populations are completely displayed in the flow pattern, preventing the cell populations from being distorted and distorted close to the boundary of the flow pattern or being completely outside the boundary.
- Regarding the closure of the sample, it is not necessary to close the sample before labeling fluorescein-coupled antibodies. Generally, the species origin of the sample cells and the flow antibody are different, such as fluorescein-coupled antibodies labeling human cells generally originate from mice, and the FcR of human cells is not necessarily able to bind to the Fc segment of fluorescein-coupled antibodies of mouse origin, but it is also possible that because of the close relationship between the species, or under certain environmental However, it is also possible that the Fc segment and FcR from different species can bind under certain environmental conditions. It is difficult for the experimenter to determine whether such binding will occur during the experiment, but blocking the sample before labeling the fluorescein-coupled antibody ensures that such non-specific binding will not occur.